Home Improvement
9 Sustainable Materials for Green Renovations
Embracing green renovations isn’t just about being trendy. It’s a step towards a healthier planet. By choosing eco-friendly materials and sustainable practices, households reduce their environmental footprint significantly.
There’s a sense of pride in making your home more eco-friendly. Green renovations can also save money in the long run, which is a nice bonus. Let us take a deeper look at the different materials used in green renovations.
1. Bamboo
Bamboo is a sustainable superstar in the world of eco-friendly materials. Quick to grow and harvest, it serves as a strong, renewable resource that’s perfect for flooring and furniture. Plus, its natural elegance brings a warm, earthy feel to any home.
Working with bamboo isn’t just good for the earth; it’s a durable option that can withstand plenty of wear and tear. Homeowners love its versatility and the way it can match different interior design styles.
2. Reclaimed Wood
Reclaimed wood stands out as a richly character material for green renovations. Repurposing timber from old buildings, barns, and warehouses, bypasses the need for new logging, conserving our forests and the ecosystem they support.
Each piece of reclaimed wood holds history, adding a unique storytelling element to your home. Not only does it provide an aesthetic boost with its mature patina and distinctive grain, but it’s also typically stronger and more durable than virgin wood due to its age and prior seasoning.
3. Recycled Metal
Recycled metal is another cornerstone in the realm of green renovations. Metals like aluminum and steel can be recycled many times without losing quality. This means using less new metal, which is good for the planet.
It’s amazing to think that old soda cans and car parts can be turned into green energy products or new building materials. Recycling metal helps to save energy and reduce mining. When we choose recycled metal, we reduce waste in landfills.
Metal’s durability makes it perfect for a variety of household items such as roofing, gutters, and appliances.
4. Recycled Glass
Recycled glass is not just for bottles and jars. It’s a versatile material that’s gaining traction in home renovations. It can be used for countertops, tiles, and even decorative elements, adding a touch of modernity to any space.
Recycled glass is made from post-consumer and industrial waste, reducing the need for new raw materials. It also takes less energy to produce compared to virgin glass.
When glass is recycled, it’s melted down and formed into new products, reducing the need for raw materials. This process saves energy and cuts down on waste. Recycled glass surfaces are durable, easy to clean, and can add a unique flair to your eco-friendly home.
5. Linoleum
Unlike vinyl, linoleum is made from natural materials including linseed oil, tree resins, and cork dust. It’s biodegradable and can be recycled at the end of its life cycle. Consider this for flooring or wall coverings.
Linoleum is also hypoallergenic, making it a great option for those with allergies or respiratory issues. It’s easy to maintain and comes in a variety of colors and patterns, allowing homeowners to customize their space while being environmentally conscious.
Choosing linoleum will reduce the amount of toxic chemicals released into the environment and promote healthier indoor air quality.
6. Wool Insulation
Natural wool insulation offers superior thermal performance while being safe and easy to install. It’s a renewable resource that also naturally purifies the air by absorbing pollutants.
Sheep wool insulation is also biodegradable and can be recycled at the end of its life cycle. It’s a great alternative to traditional fiberglass insulation, which can release harmful chemicals into the air. It also helps regulate temperatures year-round, providing comfort and energy efficiency in your home.
Sheep wool insulation is non-toxic, has no harmful chemicals, and can help reduce energy consumption. It also has a long lifespan, making it a sustainable option for homes.
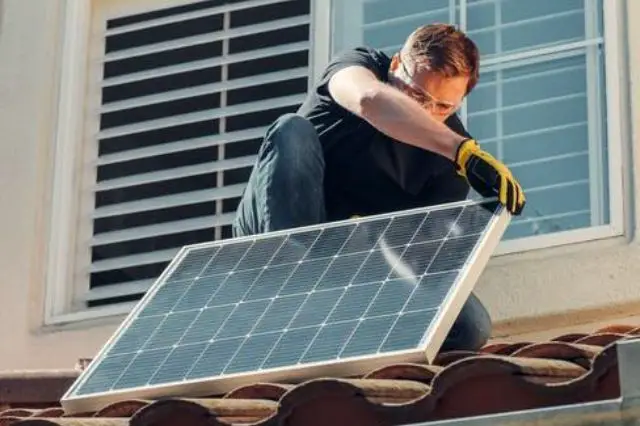
7. Solar Panels
In Nevada, solar panels are the secret to Reno’s renewable energy solutions. They capture sunlight and turn it into electricity. This is a clean way to power homes, without harming the environment. Many people are switching to solar panels because they know it’s better for our planet.
When you use solar solutions, your energy bill can go down. That’s because you use less electricity from other sources. The sun’s energy is free once you have the panels up. They have worked for many years and are a smart investment.
Many governments offer incentives and tax credits for using solar panels, making it a cost-effective option for green renovations.
8. Low-VOC Paints and Finishes
Low-VOC paints and finishes keep your indoor air quality high by releasing fewer volatile organic compounds. This means they are safer for your family and pets to be around, reducing the risk of respiratory issues and headaches that high-VOC options can cause.
You can paint and finish your walls with peace of mind, knowing that you’re not introducing harmful toxins into your home. These eco-friendly options come in a wide range of vibrant colors and finishes, promising you don’t have to sacrifice style for safety.
They can be just as durable and long-lasting as traditional paints and finishes.
9. Natural Stone
Natural stones, like granite or slate, are often used in green renovations. It lasts a long time and doesn’t harm the planet because it’s made by the earth. Many people like how natural stone looks in their kitchens and bathrooms.
Using stone means your home can have floors, walls, or counters that are cool to the touch and pretty. This material keeps your space chill in summer, cutting down on AC costs. Each piece is special, with its colors and patterns.
The Future of Green Renovations
Green renovations stand as a testament to our commitment to sustainability. These changes not only elevate our homes but also our quality of life.
By choosing eco-friendly options, we build a legacy of responsibility. Let’s continue to embrace green renovations, one step at a time, for the betterment of our planet and future generations.
As technology advances and more eco-friendly materials become available, the possibilities for greener homes are endless. We have only begun to scratch the surface of what can be achieved through sustainable practices in home renovation.
Did this article help you? Browse our blog for more interesting topics.
Do you want to be a better environmental steward? Whether because of global warming or the need to slash utility bills, there are things you can do to save the environment and reduce costs.
You don’t have to spend an arm and a leg to make your residence more environmentally friendly, either. It might be easier than you thought. If you have the right tools and the desire to roll up your sleeves and get things done, you might want to consider some DIY projects.
It can cost a small fortune to hire contractors to complete home improvement projects for you. That can still be a good investment if you’d rather get the job done up to code and safely.
You may already have the skills to tackle at least some projects. Who knows? You might enjoy DIY home renovations, remodeling, and repairs so much that you make it a career or side hustle. One way to get a feel for what the trades are like is to pursue online trade certifications that can be done not only for a relatively low amount, but also from home or anywhere else.
With that said, here are five projects you can consider implementing for better energy efficiency.
1. Change Toilets
You can save a lot of water by swapping older toilets with newer ones. For instance, a standard toilet uses about seven gallons every time you flush it. A low-flow toilet uses 1.6 gallons or less per flush, so you can drastically reduce water use and save money simultaneously.
2. Swap Light Bulbs
If you’re using incandescent light bulbs, you’re paying more for electricity than you need to.
Consider this statistic: A mere 10% of the energy used by incandescent light bulbs is transformed into light. The remaining 90%? It’s lost as heat. So, if you want a more energy efficient home, you need to upgrade your light bulbs. Yes, that means getting rid of the incandescent light bulbs.
LED light bulbs are better. They use 75% or more less energy and last up to 25 times longer than incandescents. And very little of their energy is lost as heat. You’ll get efficiency and long-lasting properties when you buy LED bulbs for your residence. You’ll also save money.
3. Switch Shower Heads
Another way to make your home more energy efficient and sustainable is by getting low-flow shower heads in the bathrooms to reduce water use.
According to one source, using a low-flow showerhead means two hours and fifty-five minutes of showering will use merely 262 gallons of water. That works out to a water reduction of 60% monthly versus using a regular shower head. You can get new shower heads relatively inexpensively, which means you can cut down on water substantially for a low investment.
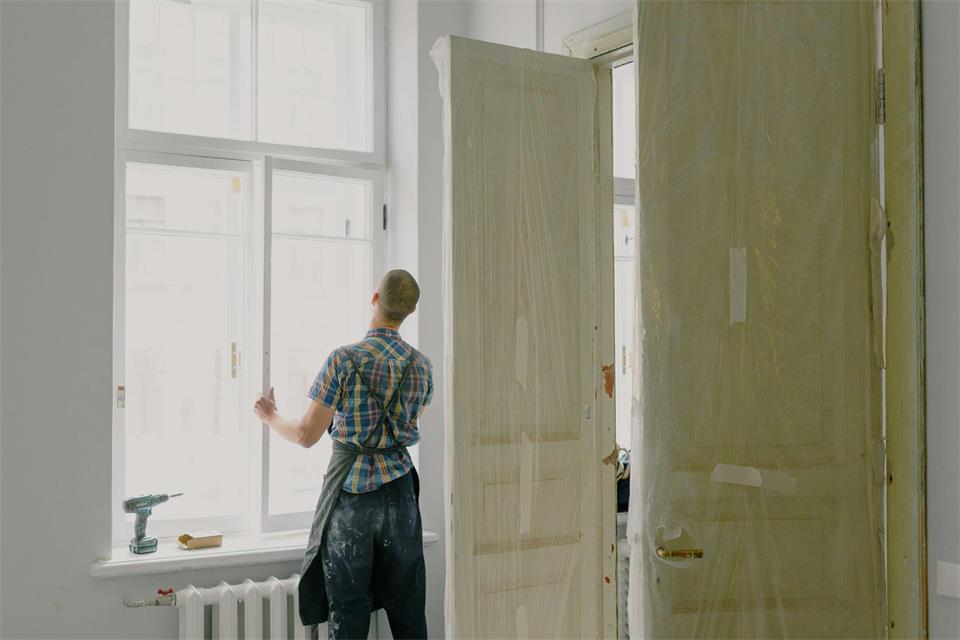
4. Address Drafty Doors and Windows
If you have drafty doors and windows, your home isn’t as energy efficient as it should be. The interior comfort will be sub-par, and your HVAC will work hard to accommodate for the drafty windows and doors. All you might need to fix the problem is some weather stripping and caulking. You can get these things at your local hardware store and apply them as necessary. Doing this can make a huge difference in your energy bills.
5. Add Insulation in the Attic
If you want to boost your energy efficiency without paying an arm and a leg, one option is to add more insulation in the attic. An older home might lack sufficient insulation. So, it’s a good idea to assess your attic and add insulation if there isn’t enough up there right now.
Getting an adequate level of insulation and sealing any drafts will make it easier to regulate the interior temperature. In fact, it can reduce your yearly energy bills by as much as 10%. Otherwise, you’ll put too much stress on your HVAC, costing you more money.
It pays to hire a professional to do any work in your attic. That’s especially the case if you have an older home that might have asbestos insulation in the attic. You probably know that asbestos is a harmful substance that’s known to cause cancer.
These are some ways you can make your home more sustainable and energy efficient. It’s not just about doing what’s best for the environment — as important as that is. But you can also maximize the spending power of your hard-earned money when you invest in sustainability.
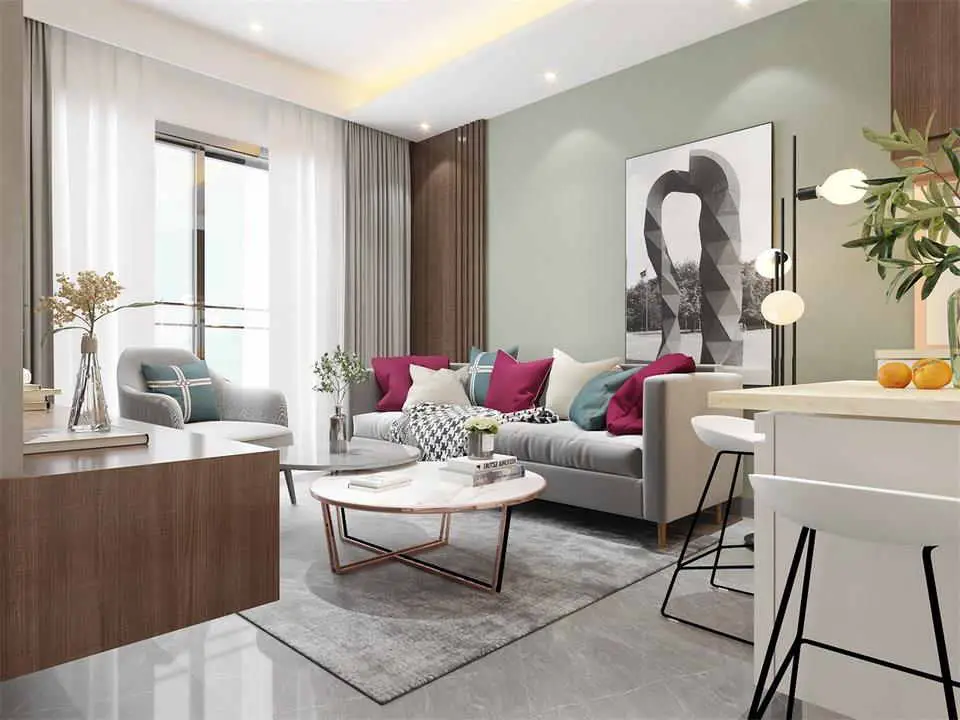
Open-plan living spaces have become increasingly popular due to their airy, spacious feel and seamless flow. However, while these expansive layouts are great for socializing and maximizing natural light, they can sometimes lack structure.
The key to making an open-plan space functional and visually appealing is to introduce distinct zones for different activities, such as lounging, dining, and working.
Here are some clever ways to achieve well-defined areas without sacrificing the openness of your home.
Use Area Rugs to Define Spaces
One of the simplest yet most effective ways to introduce zones in an open-plan living area is by using premium modern area rugs. These rugs act as visual anchors, helping to distinguish between different areas within the same room.
For instance, a large, plush rug can set apart the lounge area, while a smaller, sleek design can mark the dining space. When selecting rugs, consider complementing colors and patterns that blend well with your overall decor while still adding personality to each zone.
Incorporate Multi-Functional Furniture
Strategically placed furniture can also help create distinct areas in an open-plan space. Sofas with chaise lounges or sectional designs can subtly separate the living room from the dining area without blocking the flow of the space.
Additionally, bookcases, sideboards, or open shelving units can act as partitions while maintaining an airy feel. Consider using backless shelving units to create a semi-open division that allows light to pass through while still offering clear zoning.
Utilize Different Lighting Styles
Lighting is a powerful tool in defining zones within an open-plan layout. Consider using a variety of lighting fixtures tailored to each area’s function. A statement chandelier or pendant light over the dining table can create a focal point, while floor lamps and table lamps can add warmth to the living area.
For a home office nook, task lighting, such as an adjustable desk lamp, ensures adequate illumination while signaling a shift in purpose.
Play with Color and Materials
A subtle yet effective way to distinguish different areas within an open space is by using varying colors and materials. This can be done through contrasting wall paint, wallpaper, or even textured finishes.
For example, a feature wall behind the dining table can create a designated dining zone, while wooden paneling or a bold paint color can define a reading nook. Similarly, varying flooring materials, such as transitioning from hardwood in the living area to tiles in the kitchen, can naturally demarcate spaces.
Introduce Statement Dividers
Room dividers are a fantastic way to create zones while maintaining flexibility. Instead of traditional walls, opt for modern and stylish dividers like glass partitions, wooden slats, or metal-framed panels. Sheer curtains or folding screens can also add an element of softness and versatility, allowing you to open up or close off spaces as needed.
Arrange Seating Thoughtfully
Seating arrangements play a crucial role in defining different areas within an open-plan home. Positioning sofas and armchairs to face inward toward a central coffee table creates an inviting living space, while aligning dining chairs around a distinct table establishes a separate dining area.
If you have a workspace within the same room, using a dedicated office chair and desk setup will clearly distinguish it from the leisure zones.
Maximize Vertical Space with Hanging Elements
Another clever way to introduce zones without cluttering your space is to use hanging elements such as pendant lights, hanging planters, or ceiling-mounted shelving. Hanging a series of pendant lights above a kitchen island or dining table naturally separates it from the rest of the room.
Similarly, suspending plants in one corner can create a cozy reading nook or relaxation spot.
Introduce Greenery for Natural Separation
Houseplants are not only great for aesthetics and air quality but can also act as natural dividers in an open-plan space. Large potted plants, such as fiddle-leaf figs, snake plants, or tall palms, can create subtle separations while maintaining a fresh and organic feel.
For a more structured approach, consider placing plants on tiered shelves or along room edges to reinforce different zones.
Define Spaces with Raised or Sunken Areas
Architectural elements such as raised platforms or sunken floors can create an instant sense of zoning in an open-plan space. A slightly elevated dining area or a sunken lounge provides clear visual cues while maintaining an uninterrupted flow. This design technique is particularly useful in loft-style apartments or homes with high ceilings.
Use Sliding or Folding Doors for Flexibility
For those who want the option of closing off certain spaces when needed, sliding or folding doors are a great solution. Glass or wooden sliding doors can separate a home office or guest room from the main living area without making the space feel too enclosed.
Folding doors provide the flexibility to open up or partition off spaces as required, making them a versatile addition to any open-plan layout.

Maintaining a vibrant lawn no longer demands countless hours of hard work. Thanks to exciting innovations in lawn care technology, homeowners can enjoy a beautifully manicured yard without the strenuous labor of the past.
Here are some remarkable gadgets that make lawn maintenance seamless and efficient, allowing you to spend less time working and more time enjoying the lush paradise right outside your door.
1. Solar-Powered Mowers
Solar-powered mowers are an excellent choice for those looking to reduce their carbon footprint while keeping their lawn in shape. These self-sustaining devices harness the sun’s energy, eliminating the need for gas or frequent battery charges. Many models come with innovative programming, allowing them to operate autonomously with minimal user input.
2. AI-Powered Lawn Monitors
With AI-powered lawn monitors, keeping track of your lawn’s health is now easier. These devices analyze soil conditions, detect pests, and provide insights on watering and fertilization. By syncing with mobile apps, they offer real-time recommendations tailored to your specific lawn conditions, ensuring optimal growth.
3. Remote-Controlled Mowers
Remote-controlled mowers are a fantastic alternative if you prefer a hands-on approach but want to avoid the strain of traditional mowing. These machines offer precision cutting with minimal effort and are especially useful for navigating tight spaces, slopes, or uneven terrain.
4. Zero Turn Lawn Mowers
For large yards that require frequent mowing, zero turn lawn mowers offer unmatched efficiency. These high-performance machines allow for seamless manipulation around trees, flower beds, and other obstacles, cutting down mowing time significantly.
5. Smart Fertilizer Spreaders
Excessive or insufficient fertilization can damage your lawn, turning it into a patchy mess. Fortunately, smart fertilizer spreaders have emerged to streamline the process. These advanced devices use algorithms to deliver fertilizer accurately, ensuring your lawn gets the nutrients it needs without waste.
Many models offer mobile app integration for easy scheduling, helping your outdoor space thrive.
6. High-Precision Dethatchers
A thick layer of thatch can deprive your grass of the oxygen, water, and nutrients it needs to thrive, resulting in a lackluster lawn. High precision dethatchers are an excellent solution, effortlessly cutting through this suffocating barrier and revitalizing your turf.
With both electric and battery-operated models available, dethatching becomes a simple and quick task, transforming what was once a laborious chore. Say goodbye to the strenuous effort of manual raking and enjoy a lush, vibrant lawn that can breathe and flourish!
7. Automated Pest Control Devices
Lawn pests can quickly destroy even the most well-maintained grass. Automated pest control devices use ultrasonic sound waves or natural repellents to deter insects and rodents without harmful chemicals. These eco-friendly solutions help maintain a healthy lawn without requiring constant monitoring.
8. Self-Watering Grass Mats
If you struggle with keeping your lawn hydrated, self-watering grass mats offer an innovative solution. These mats retain moisture and gradually release it into the soil, ensuring consistent hydration. Ideal for dry climates or busy homeowners, they reduce the need for frequent watering.
9. Grass-Clipping Composters
Instead of disposing of grass clippings, why not turn them into natural fertilizer? Grass-clipping composters break down lawn debris into nutrient-rich compost that can be reused for your lawn and garden. These devices accelerate the decomposition process, reducing waste and enriching soil health.
10. Lawn Mapping Drones
For those who love precision in lawn care, drones equipped with mapping technology can scan your lawn and provide detailed reports on patchy areas, soil health, and growth patterns. This technology helps homeowners optimize their lawn care routine by identifying specific areas that need attention.
Final Thoughts
The days of spending countless hours on lawn care are behind us. With modern technology, transforming your yard into a lush oasis has never been easier. Imagine a sleek, solar-powered mower gliding smoothly across your grass, quietly trimming the blades to perfection while utilizing solar energy.
Envision automated pest control systems quietly protecting your garden, using advanced technology to deter unwanted pests without disturbing your serene outdoor space.
Investing in these smart lawn care solutions frees up your weekends and ensures that your outdoor area remains vibrant and healthy with minimal effort. Embrace the future of landscaping and watch your yard flourish, providing you with a beautiful retreat without requiring much work on your part.

5 Ways Custom Photography Helps Small Businesses Stand Out Online

How Big International Tournaments Change Betting Behaviour

Life After an Injury Feels Different in Ways Nobody Warns You About

Why Aviator Changed the Feel of Betting More Than Most Games

How to Pay an Attorney: Types of Free Agreements

When Is a Single Family Rental Property a Good Investment?

How to Maximize Your Car Accident Settlement and Avoid Getting Lowballed
-

 Captions5 years ago
341 Sexy Captions to Fire Up Your Instagram Pictures
-

 Captions5 years ago
311 Night Out Captions for Instagram and Your Crazy Night
-

 Captions5 years ago
245 Saree Captions for Instagram to Boost Your Selfies in Saree
-

 Captions5 years ago
256 Best Ethnic Wear Captions for Instagram on Traditional Dress
-

 Captions5 years ago
275 Deep Captions for Instagram to Express Your Thoughts
-

 Captions5 years ago
230 Blurred Picture Captions for Instagram
-

 Quotes5 years ago
222 Nail Captions for Instagram to Showcase Your Fresh Manicure
-

 Captions5 years ago
211 Laughing Captions for Instagram | Laughter Is the Best Medicine