Lifestyle
Ultimate Guide on How to Decorate for Christmas
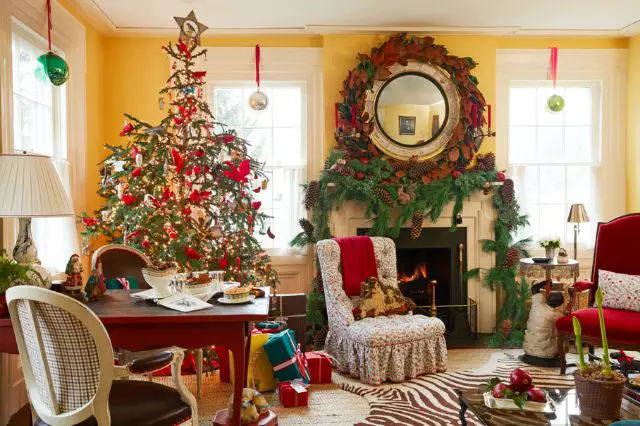
When the holiday season approaches, there’s nothing quite as exciting as decorating your home for Christmas. The twinkling lights, fragrant evergreen trees, and festive ornaments create an atmosphere of joy and togetherness.
Among the many decorations that adorn our homes during this festive season, stained glass ornaments stand out for their beauty and significance.
If you’re not an expert at decorating for Christmas, don’t worry! This guide will help you make your home look super nice and Christmassy.
So, let’s get started with making your home look fantastic for the Christmas holidays!
1. Planning Your Christmas Decorations
Before you dive into decorating for Christmas, it’s essential to plan your approach. Here are some tips to consider:
1.1. Set a Budget
Determine how much you’re willing to spend on decorations, including lights, ornaments, and other holiday décor. Having a budget in mind will help you make smart choices and avoid overspending during the holiday season.
1.2. Choose a Decorating Theme
Your Christmas theme will set the tone for your decorations. Consider classic themes like traditional, rustic, modern, or whimsical. Your theme will guide your choice of colours, ornaments, and other decorations.
1.3. Make a Checklist
Create a checklist of all the items you need to decorate your home for Christmas. This can include items like a Christmas tree, ornaments, wreaths, lights, garlands, stockings, and more. Having a checklist will keep you organized and ensure you remember everything.
2. Decorating Your Christmas Tree
The Christmas tree is usually the most important decoration during the holiday season. Whether you prefer a real tree or an artificial one, here’s how to decorate it in style:
2.1. Select the Right Tree
If you opt for a real tree, choose one that’s fresh and healthy. For artificial trees, select one that fits your space and theme.
2.2. Lighting
Start by stringing lights on the tree before adding ornaments. LED lights are energy-efficient and come in various colors and styles. Make sure the lights are spread out nicely and that each one is turned on and working well before you continue.
2.3. Ornaments
Choose a color scheme for your ornaments that complements your theme. Traditional red and green, gold and silver, or a pastel palette are popular choices. Hang the larger ornaments first and then fill in with smaller ones. Remember to include sentimental or handmade ornaments that hold special memories.
2.4. Tree Topper
Finish off your tree with a beautiful tree topper, such as a star, angel, or a unique ornament that fits your theme.
3. Wreaths and Garlands
Wreaths and garlands can be used to decorate various areas of your home, both indoors and outdoors. Here’s how to use them effectively:
3.1. Front Door Wreath
A wreath on your front door is a warm welcome to guests. Choose a wreath that matches your theme, and consider adding a festive bow or ribbon for an extra touch.
3.2. Mantel Garlands
Decorate your fireplace mantel with garlands. You can intertwine them with string lights and add ornaments or small decorative items to create a charming holiday display.
3.3. Staircase Garlands
If you have a staircase, wrap garlands around the handrail to create a beautiful, sweeping effect. Consider adding ornaments and bows at regular intervals.
4. Outdoor Decorations
Don’t forget to extend your Christmas decorating to the outdoors to spread holiday cheer to your neighbors and passersby. Here are some ideas for outdoor decorations:
4.1. Lights
Wrap outdoor trees, bushes, and architectural features with string lights to create a festive glow. Consider using solar or LED lights for energy efficiency.
4.2. Lawn Decorations
Place lawn ornaments, such as reindeer, snowmen, or large ornaments, to create a winter wonderland in your front yard.
4.3. Wreaths
Hang wreaths on your windows or the exterior of your home. These are visible from the street and add a charming touch to your Christmas decor.
5. Setting the Table
Your holiday decorations should extend to your dining table, creating a warm and inviting atmosphere for your festive feasts. Here’s how to set the perfect Christmas table:
5.1. Tablecloth and Linens
Choose a tablecloth and napkins that match your theme. Consider using elegant runners or placemats for an added layer of decoration.
5.2. Dinnerware
Select dinnerware and flatware that complement your theme. Special holiday plates or colorful chargers can add a festive touch to your table.
5.3. Centerpiece
Create a beautiful centerpiece for your table. This could be a floral arrangement, a collection of candles, or a combination of both. Be sure it doesn’t obstruct the view or conversations.
5.4. Name Cards
Personalize your dining experience by creating name cards for each guest. You can make these things either very basic or really fancy, depending on the style you want.
6. DIY Christmas Decorations
If you’re looking to add a personal touch to your Christmas decorations, consider making some of your own. Here are a few DIY decoration ideas:
6.1. Handmade Ornaments
Create custom ornaments using craft supplies like felt, paper, or clay. These can be personalized with names, dates, or special messages.
6.2. Homemade Wreaths
Craft your own wreath using items from your garden or craft store. You can make wreaths from pinecones, holly, or even old Christmas cards.
6.3. Mason Jar Luminaries
Paint and decorate mason jars to create charming luminaries. Place tea lights or battery-operated candles inside for a warm, festive glow.
7. Sustainable Decorations
With a growing focus on sustainability, many are opting for eco-friendly Christmas decorations made from natural, recyclable materials.
7.2. Minimalism
The less-is-more approach is gaining popularity. Simplify your decorations to create a minimalist and elegant holiday look.
7.3. Vintage and Retro
Nostalgia is making a comeback with vintage-inspired ornaments and decorations. Look for items reminiscent of Christmases past.
8. Safety and Maintenance
While decorating for Christmas is a joyful experience, it’s essential to keep safety in mind. Here are some safety and maintenance tips to consider:
8.1. Check Lights
Inspect all lights for frayed wires or broken bulbs. Replace any damaged items to prevent electrical issues or fire hazards.
8.2. Secure Decorations
Make sure all decorations are securely anchored and won’t pose a tripping hazard. This is especially important for outdoor decorations subject to wind and weather.
8.3. Water Your Tree
If you have a live tree, keep it watered to prevent it from drying out. A well-hydrated tree is less likely to become a fire hazard.
8.4. Childproof Decorations
If you have young children or pets, consider the placement of decorations to ensure they won’t be easily accessed or knocked over.
Final Tip
In the end, decorating for Christmas is all about making your home feel warm and special.
Remember to plan, stay safe, and, most importantly, enjoy the process of transforming your living space into a winter wonderland for your family and friends to cherish.
So, grab your ornaments, hang the wreaths, and let the holiday magic unfold in your home.
And don’t forget to share a photo of your Christmas tree or your favorite holiday decoration in the comments. We’d love to see it!
Merry Christmas and happy decorating!

An accident can change your daily routine almost overnight. One minute you’re carrying groceries, driving to work, walking the dog, doing all the boring little things nobody thinks twice about. Then suddenly even getting out of bed feels like a project that requires strategy, patience, and maybe a deep sigh or two.
It’s frustrating. Sometimes really frustrating.
People often focus on the injury itself, but honestly, the emotional side of recovery can hit just as hard. Losing independence for a while messes with your head. Even small tasks can start feeling weirdly overwhelming.
That’s why learning how to manage everyday life after an injury matters so much.
Stop Expecting Yourself to Function Normally Right Away
This sounds simple, but a lot of injured people struggle with it.
They keep trying to operate at 100 percent while their body is clearly waving a giant “please slow down” sign. Maybe you’re used to being productive all the time. Maybe you hate asking for help. A lot of people do.
Still, healing usually takes longer when you push too hard too soon.
Give yourself permission to scale things back temporarily. Laundry can wait an extra day. Dishes don’t need to sparkle like a commercial kitchen. Your body is already working overtime behind the scenes trying to recover.
Build Small Routines Instead of Big Goals
After an injury, huge goals can feel exhausting before breakfast. Small routines work better.
Focus on manageable habits that create structure without draining your energy. Wake up around the same time. Eat actual meals instead of random crackers from the pantry. Take short walks if your doctor approves. Keep medications and appointments organized in one place because pain fog is very real sometimes.
Honestly, tiny routines create a sense of control when everything else feels chaotic. And don’t underestimate how much mental relief comes from checking off small tasks.
Make Your Space Easier to Navigate
You notice awkward parts of your home very quickly after getting injured.
Suddenly stairs feel steeper. Showers feel slippery. Reaching for things on high shelves becomes annoyingly complicated. One woman I knew moved her coffee mugs to waist level after shoulder surgery because lifting her arm every morning nearly made her cry. Little adjustments matter.
Try rearranging frequently used items so they’re easier to access. Use supportive pillows. Keep chargers, medications, snacks, and water nearby. It sounds minor, but reducing unnecessary movement can conserve energy throughout the day.
The Centers for Disease Control and Prevention also offers practical injury recovery and fall-prevention information that can help make home environments safer during rehabilitation.
Let People Help Without Feeling Guilty
This one’s hard for independent people.
Friends or family may offer rides, meals, childcare, or help cleaning your house, and your instinct might be to refuse because you don’t want to feel like a burden. Totally understandable. But accepting help temporarily doesn’t make you weak.
It makes you human.
Most people genuinely want to support someone they care about. Besides, you’d probably help them too if the situation were reversed. You don’t have to carry everything alone just to prove a point to yourself.
Pay Attention to Your Mental Health Too
Recovery gets lonely sometimes. Pain changes moods. Limited mobility affects confidence. Financial stress piles on quickly if work gets interrupted. Even outgoing people can start feeling isolated after weeks of appointments and restricted activity.
Talk to somebody if those feelings start getting heavy. That could mean a trusted friend, therapist, support group, or doctor. Emotional recovery deserves attention too, even though people often treat it like an afterthought.
And honestly, healing tends to go more smoothly when your stress levels aren’t constantly through the roof.
The Practical Stuff Can Get Complicated
Medical bills, insurance paperwork, missed workdays, vehicle repairs. Accidents create a mountain of practical problems while you’re already exhausted.
That’s partly why some injured individuals eventually speak with personal injury lawyers in South Carolina when accidents involve negligence or serious financial consequences. Understanding your options can sometimes reduce uncertainty during an already stressful period.
Still, day-to-day recovery matters just as much as the legal side.
Healing rarely happens in a straight line. Some days feel productive. Other days you’ll wonder why putting on socks suddenly requires Olympic-level effort. That’s normal too. The important thing is giving yourself time, support, and enough patience to move forward one day at a time without expecting perfection from yourself every hour of the day.

Losing someone you love changes everything about your life, from the big moments to the small ones. Sure, it affects how you make it through the holidays and deal with major milestones, but the ordinary day-to-day moments are what hurt the most. Learning to cope with this loss becomes the biggest challenge and obstacle in your life.
In reality, grief is not a problem to be solved or a phase to be rushed through – it’s a natural response to losing someone who mattered. But how a family navigates grief together can make an enormous difference in how people come out the other side.
Grief can pull families apart just as easily as it can bring them together. Everyone processes loss differently, and when those differences collide, there’s significant friction. The families that cope well are the ones who make intentional choices about how they show up for each other during this season.
Give Permission to Grieve Differently
It’s dangerous to assume that everyone should be grieving the same way at the same pace. Truthfully, grief looks completely different from person to person, even among people who loved the same person. One family member might need to constantly talk about the person in order to keep their memory alive. Another might go quiet, processing everything internally.
It’s also worth pointing out that children grieve differently than adults, and their grief often comes out in unexpected ways. If you aren’t prepared for this, it can confuse you as a parent and make you wonder what they’re thinking. And don’t be surprised if teenagers try to pull away from the family altogether and find support elsewhere. It’s all extremely complicated.
The goal of all of this isn’t to make everyone grieve the same way. What you want to do is create enough safety and acceptance within the family that people feel free to grieve in whatever way is right to them.
Keep Communication Lines Open
Families that cope well with loss tend to keep talking, even when the conversations are painful. That means checking in on each other genuinely rather than just asking “are you okay” and accepting “fine” as an answer. It also means creating space where the person who passed away can be talked about without making others uncomfortable.
Silence, while sometimes necessary and appropriate, can become a burden when it’s the default response. When family members sense that certain topics are off limits, they start carrying their grief alone. (And that isolation makes everything feel heavier for them.)
If communication has broken down entirely, family therapy is a very useful tool. A skilled therapist who specializes in working with grieving families can help create some structure and safety to make productive conversations possible.
Maintain Routines Where You Can
In the immediate aftermath of a loss, routines fall apart. While that’s okay for the first few days or even weeks, it can’t carry on forever. Over time, reestablishing some degree of structure provides a really nice anchor that will help everyone in the family – especially children – feel a sense of stability.
Things like shared meals, regular bedtimes, and weekly rituals are all extremely healthy. Having predictable moments in the day gives people something to organize around when everything else about life feels chaotic. It also creates natural opportunities for connection, which are extremely necessary during this time.
Get the Right Support
Sometimes loss comes with circumstances that extend beyond the emotional. When a family member dies as a result of something someone else did (or didn’t do), the grief is compounded.
Wrongful death claims are one avenue families have for pursuing accountability and compensation in these situations, but the process is not straightforward.
As the attorneys at Raybin & Weissman, P.C. explain, “Filing a wrongful death claim isn’t as simple as you might think. To file the claim, you’ll need to meet the state’s relationship requirements. A wrongful death attorney can help you navigate these requirements.”
Having someone in your corner who understands the process is exactly the kind of support that matters during an overwhelming time like this. The broader point is that no family should try to navigate loss like this entirely alone.
Whether that support comes from a grief counselor, pastor, close friends, or a legal team, surrounding yourself with people who carry some of the weight for you is a healthy thing to do.
Be Patient With the Process and With Each Other
Grief doesn’t follow a timeline, and it doesn’t move in a straight line. What families who cope well have in common is a willingness to keep extending grace to each other. The person you lost was loved by everyone in your family, and that shared love is an important foundation that you can build upon for many years to come.

Do you want to be a better environmental steward? Whether because of global warming or the need to slash utility bills, there are things you can do to save the environment and reduce costs.
You don’t have to spend an arm and a leg to make your residence more environmentally friendly, either. It might be easier than you thought. If you have the right tools and the desire to roll up your sleeves and get things done, you might want to consider some DIY projects.
It can cost a small fortune to hire contractors to complete home improvement projects for you. That can still be a good investment if you’d rather get the job done up to code and safely.
You may already have the skills to tackle at least some projects. Who knows? You might enjoy DIY home renovations, remodeling, and repairs so much that you make it a career or side hustle. One way to get a feel for what the trades are like is to pursue online trade certifications that can be done not only for a relatively low amount, but also from home or anywhere else.
With that said, here are five projects you can consider implementing for better energy efficiency.
1. Change Toilets
You can save a lot of water by swapping older toilets with newer ones. For instance, a standard toilet uses about seven gallons every time you flush it. A low-flow toilet uses 1.6 gallons or less per flush, so you can drastically reduce water use and save money simultaneously.
2. Swap Light Bulbs
If you’re using incandescent light bulbs, you’re paying more for electricity than you need to.
Consider this statistic: A mere 10% of the energy used by incandescent light bulbs is transformed into light. The remaining 90%? It’s lost as heat. So, if you want a more energy efficient home, you need to upgrade your light bulbs. Yes, that means getting rid of the incandescent light bulbs.
LED light bulbs are better. They use 75% or more less energy and last up to 25 times longer than incandescents. And very little of their energy is lost as heat. You’ll get efficiency and long-lasting properties when you buy LED bulbs for your residence. You’ll also save money.
3. Switch Shower Heads
Another way to make your home more energy efficient and sustainable is by getting low-flow shower heads in the bathrooms to reduce water use.
According to one source, using a low-flow showerhead means two hours and fifty-five minutes of showering will use merely 262 gallons of water. That works out to a water reduction of 60% monthly versus using a regular shower head. You can get new shower heads relatively inexpensively, which means you can cut down on water substantially for a low investment.
4. Address Drafty Doors and Windows
If you have drafty doors and windows, your home isn’t as energy efficient as it should be. The interior comfort will be sub-par, and your HVAC will work hard to accommodate for the drafty windows and doors. All you might need to fix the problem is some weather stripping and caulking. You can get these things at your local hardware store and apply them as necessary. Doing this can make a huge difference in your energy bills.
5. Add Insulation in the Attic
If you want to boost your energy efficiency without paying an arm and a leg, one option is to add more insulation in the attic. An older home might lack sufficient insulation. So, it’s a good idea to assess your attic and add insulation if there isn’t enough up there right now.
Getting an adequate level of insulation and sealing any drafts will make it easier to regulate the interior temperature. In fact, it can reduce your yearly energy bills by as much as 10%. Otherwise, you’ll put too much stress on your HVAC, costing you more money.
It pays to hire a professional to do any work in your attic. That’s especially the case if you have an older home that might have asbestos insulation in the attic. You probably know that asbestos is a harmful substance that’s known to cause cancer.
These are some ways you can make your home more sustainable and energy efficient. It’s not just about doing what’s best for the environment — as important as that is. But you can also maximize the spending power of your hard-earned money when you invest in sustainability.

5 Ways Custom Photography Helps Small Businesses Stand Out Online

How Big International Tournaments Change Betting Behaviour

Life After an Injury Feels Different in Ways Nobody Warns You About

Why Aviator Changed the Feel of Betting More Than Most Games

How to Pay an Attorney: Types of Free Agreements

When Is a Single Family Rental Property a Good Investment?

How to Maximize Your Car Accident Settlement and Avoid Getting Lowballed
-

 Captions5 years ago
341 Sexy Captions to Fire Up Your Instagram Pictures
-

 Captions5 years ago
311 Night Out Captions for Instagram and Your Crazy Night
-

 Captions5 years ago
245 Saree Captions for Instagram to Boost Your Selfies in Saree
-

 Captions5 years ago
256 Best Ethnic Wear Captions for Instagram on Traditional Dress
-

 Captions5 years ago
275 Deep Captions for Instagram to Express Your Thoughts
-

 Captions5 years ago
230 Blurred Picture Captions for Instagram
-

 Quotes5 years ago
222 Nail Captions for Instagram to Showcase Your Fresh Manicure
-

 Captions5 years ago
211 Laughing Captions for Instagram | Laughter Is the Best Medicine